HX-D001-RFBT15-V1.1
-
Product Introduction:
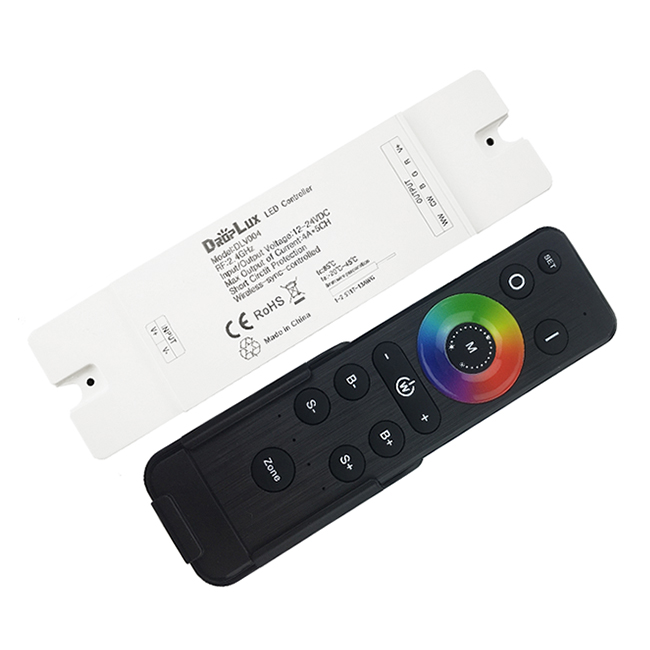
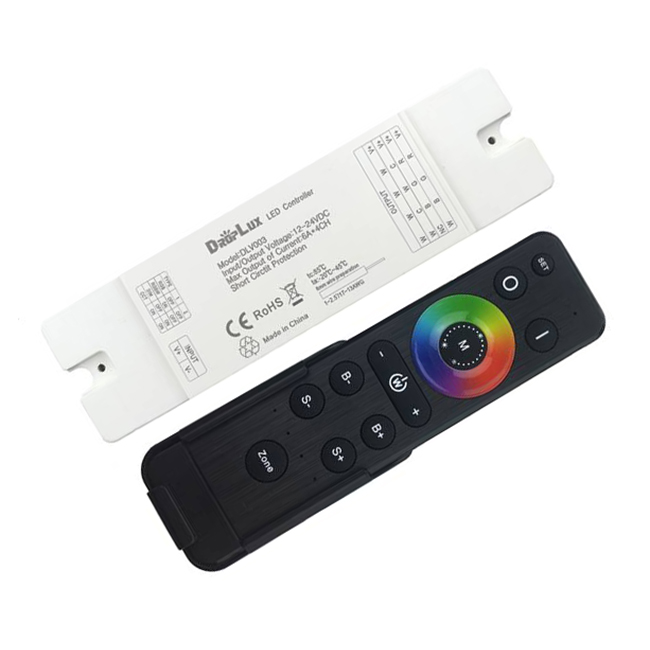
D001 series led controller for DIM/CCT/RGB/RGBW with RFBT15 remote Controller adopts the most advanced PWM (Pulse Width Modulation) digital control technology, it is used for controlling constant voltage LED lamps. For instance, point source of light, flexible light strip, led modules, led strings and so on; it is integrated 4 optional programs for different color type LEDs, contains single color/CW+WW/RGB/RGBW. It means only one item stock for 4 types applications
Product Details
Features:
1) Easy-going products set for small application;
2) Remote control powered by 3V (AAA*2), receiver powered by DC12-24V;
3) Easy to access and store with magnetic suction;
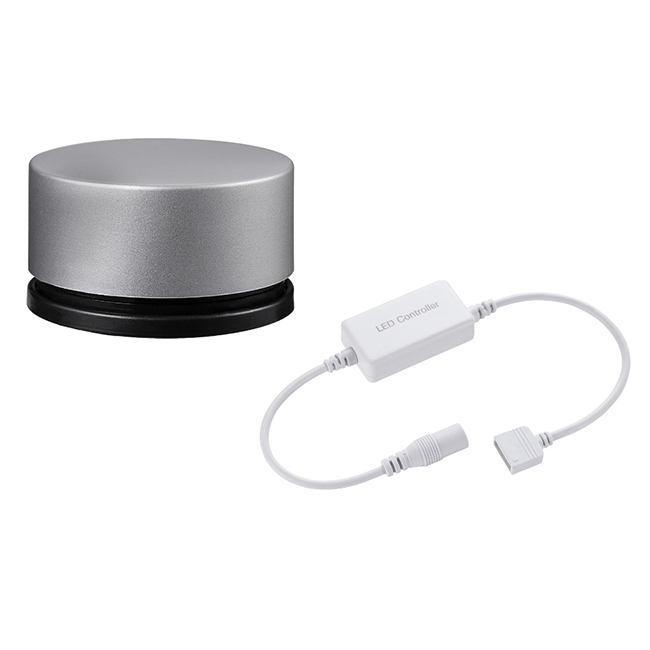
4) Circular knob design, unique interface and easy operation;
5) Functions: ON/OFF, dim function, colors, dynamic modes;
6) Adopts RF 2.4GHz wireless control, remote control distance up to 30m and no directional;
7) 4 in 1 receiver, 1 item for 4 types led strips;
8)Output current: 4ch*4A(DIM), 4chs*4A(CCT), 3chs*5A(RGB), 4chs*4A(RGBW).
9) 3 years warranty.
Technical Parameters
Remote controlпјҡRFBT15
Remote Control Function
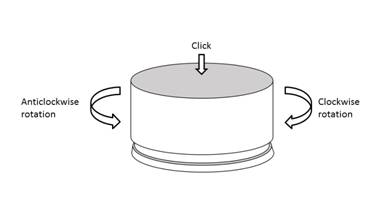
DIM (work with single color receiver)
ON/OFF: Short-click
Adjusting brightness/speed: Rotating
Modes: Double-short-click
Modes list
CCT(work with CW+WW receiver)
ON/OFF: Short-click
Adjusting brightness/speed: Rotating
Adjusting CCT: Pressing+Rotating
Modes: Double-short-click
Modes list
RGB(work with RGB receiver)
ON/OFF: Short-click
Adjusting brightness/speed: Rotating
Adjusting color: Pressing+Rotating
Modes: Double-short-click
Modes list
RGBW(work with RGBW receiver)
ON/OFF: Short-click
RGB/W switching: 2s-long-pressing
Adjusting brightness/speed: Rotatin
Adjusting color: Pressing+Rotating
Modes: Double-short-click
Hotkey: 3 times-short-click to overall ON/OFF
Modes list
Typical Applications
Application Circuit 1: Single color

Application Circuit 2: CW+WW

Application Circuit 3: RGB

Application Circuit 4: RGBW

Wireless remote control code value setting method
The number of controllers and remote controls in one system is unlimited. 2.4G Smart system has one unique RF code for communication. Each controller and each remote control can remember only one RF code, recorded in the first programing. New RF code can be recorded after delete the old one.
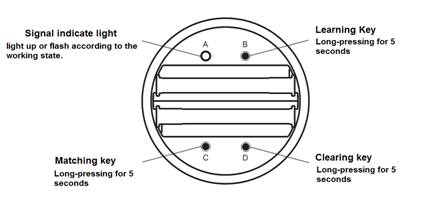
Code matching operation: the receiver will only be controlled by the value code remote control.
1) Main remote control: Press and hold “C” key for 5 seconds. The indicator of the remote control will flash quickly, means it enters the pairing code transmission status.
2) New remote control: Press and hold “B” key for 5 seconds, indicator will turn from 100% to off means it enters learning code status.
3) Indicator of the new remote control flash three times after successful code learning.
Remote control RF code learning from controllers
1) Turn off the power supply of the controllers.
2) Press and hold “B” key for 5 seconds until indicator of remote control turns off.
3) Turn on the power supply of the controllers. Indicator of the remote control flashes three times after successful code learning.
Note: The distance from controllers to remote controls should be less than 2 meters.
Restoring factory settings of remote control
1) Press and hold “B” key for 20 seconds until indicator of remote control process the state as 100% -off-100%.
2) Press “D” button to submit and finish the operation. Indicator of the remote control will flash three times after successful operation.
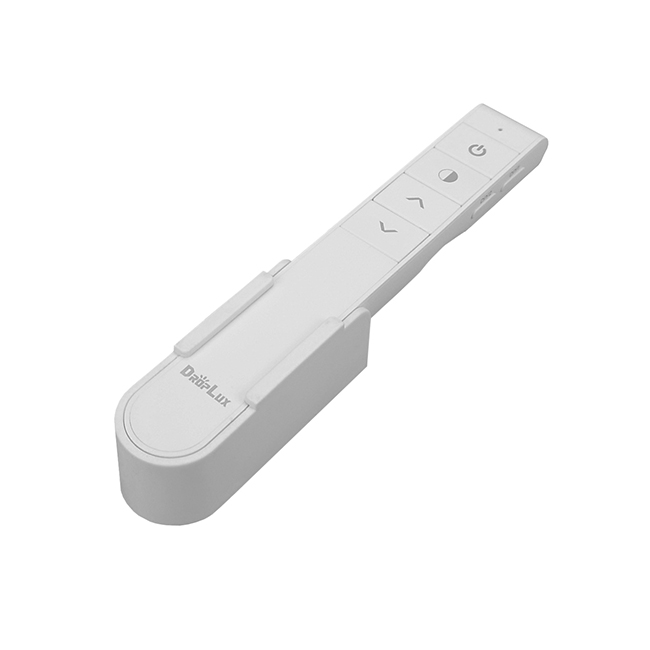
7. Remote control accessories installation instructions
Accessories include holder 1pc, 3M foam sponge glue 1pc,AAA batteries 2pcs.
Installation instruction:
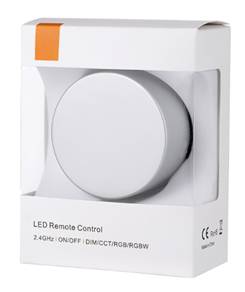
Product information for placing order
1) Easy-going products set for small application;
2) Remote control powered by 3V (AAA*2), receiver powered by DC12-24V;
3) Easy to access and store with magnetic suction;
4) Circular knob design, unique interface and easy operation;
5) Functions: ON/OFF, dim function, colors, dynamic modes;
6) Adopts RF 2.4GHz wireless control, remote control distance up to 30m and no directional;
7) 4 in 1 receiver, 1 item for 4 types led strips;
8)Output current: 4ch*4A(DIM), 4chs*4A(CCT), 3chs*5A(RGB), 4chs*4A(RGBW).
9) 3 years warranty.
Technical Parameters
Remote controlпјҡRFBT15
| Working temperature | -20-60в„ғ | Working voltage | 3V(AAA*2PCS) |
| Sleep current | <25uA | Emission current | <17mA |
| Sleep power consumption | <75uW | Emission power consumption | <51mW |
| Net weight | 80g | Dimension | Φ60*35mm |
| RF distance | ≤30m | RF frequency | 2.4GHz |
| Accessories | holder 1pc, 3M foam sponge glue 1pc. | ||
Receiver: D001
| Working temperature | -20-60в„ғ | Supply voltage | DC12V-24V |
| Static power consumption | <1W | Connecting mode | Common anode |
| Grayscale | 1024 levels | Speed stage | 1024 levels |
| External dimension | L70*W40*H20 mm | Packing size | L95*W47*H33mm |
| Net weight | 45g | Gross weight | 65g |
| RF frequency | 2.4GHz | RF distance | ≤20m |
| Short circuit protection | Yes | Memory function | Yes |
| Output | 4 channels | Output current | ≤4A(each channel) |
| PWM frequency | 1.95KHz | Max. Output power | 12V:<192W, 24V:<384W |
Dimensions
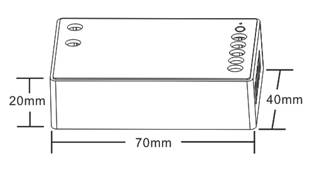
Interface Specifications
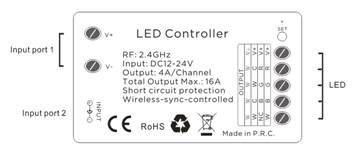
Direction for use
Step 1: Connect the load wire at first, followed by the power wire, please ensure short circuit can not occur between wires before turning on the power;
Step 2: Setting the type of output as blow, please ensure the indicate light in correct color according to the loading LED’s type:
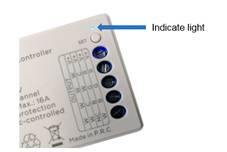
| Indicate light color | Red | Yellow | Green | Blue |
| Loading LED’s type | Single color | CW+WW | RGB | RGBW |
(Indicate light color & output type)
Step 3: Matching the code with remote. Before matching the code, receiver can be controlled by any remote control in any zone (the functions are according to receiver’s output type which was set in Step 2). Matching code operation will achieve unique-control. Please read “About RF code” part for operation instruction.Remote Control Function

DIM (work with single color receiver)
ON/OFF: Short-click
Adjusting brightness/speed: Rotating
Modes: Double-short-click
Modes list
| No. | Mode | Marks |
| 1 | Flash | Rotating to adjust the speed |
| 2 | Fade |
ON/OFF: Short-click
Adjusting brightness/speed: Rotating
Adjusting CCT: Pressing+Rotating
Modes: Double-short-click
Modes list
| No. | Mode | Marks | No. | Mode | Marks |
| 1 | WW+CW flash | Rotating to adjust the speed | 3 | WW/CW flash in turn | Rotating to adjust the speed |
| 2 | WW+CW fade | 4 | WW/CW fade in turn |
ON/OFF: Short-click
Adjusting brightness/speed: Rotating
Adjusting color: Pressing+Rotating
Modes: Double-short-click
Modes list
| No. | Mode | Marks | No. | Mode | Marks |
| 1 | 3 colors flash | Rotating to adjust the speed | 5 | White flash | Rotating to adjust the speed |
| 2 | 7 colors flash | 6 | White fade | ||
| 3 | 3 colors fade | 7 | Red-blue fade | ||
| 4 | 7 colors fade | 8 | Green-blue fade |
ON/OFF: Short-click
RGB/W switching: 2s-long-pressing
Adjusting brightness/speed: Rotatin
Adjusting color: Pressing+Rotating
Modes: Double-short-click
Hotkey: 3 times-short-click to overall ON/OFF
Modes list
| No. | Mode | Marks | No. | Mode | Marks |
| 1 | 3 colors flash | Rotating to adjust the speed | 5 | White flash | Rotating to adjust the speed |
| 2 | 7 colors flash | 6 | White fade | ||
| 3 | 3 colors fade | 7 | Red-blue fade | ||
| 4 | 7 colors fade | 8 | Green-blue fade |
Application Circuit 1: Single color

Application Circuit 2: CW+WW

Application Circuit 3: RGB

Application Circuit 4: RGBW

Wireless remote control code value setting method
The number of controllers and remote controls in one system is unlimited. 2.4G Smart system has one unique RF code for communication. Each controller and each remote control can remember only one RF code, recorded in the first programing. New RF code can be recorded after delete the old one.

Code matching operation: the receiver will only be controlled by the value code remote control.
| Step | Operation | Instructions |
| 1 | Connecting the load to the receiver and power on it. |
1.It is necessary to clear the code first, if the receiver was coded before. 2.Batch operation can be performed within the remote control range. 3. Please remember to cut off other un-code zones power, or will be paired together. |
| 2 | Press and hold “C” on the remote control for 5 seconds | The indicator of the remote control will flash quickly, see the load light flashes 3 times and return to the initial state, means matching coding is finished successfully |
| 3 | Press any key to exit and end the operation | Also will automatically exit code transmission status after 60 seconds |
Code clearing operation: that the original code value of the receiver will be cleared and returned to the factory state. Then it can be controlled by any compatible remote control, also can be paired to a new code.
| Step | Operation | Instructions |
| 1 | Connecting the load to the receiver and power on it. |
1. The clearing operation should be finished within 1 minute after the receiver is powered on. 2. Batch operation can be performed within the remote control range. |
| 2 | Press and hold “D” on the remote control for 5 seconds |
1. The indicator of the remote control will flash quickly, see the load light flashes 3 times and return to the initial state, means pairing coding is finished successfully. 2. If the original remote control is lost, the new remote control can be used for clearing operations. |
| 3 | Press any key to exit and end the operation | Also will automatically exit code transmission status after 60 seconds. |
Code learning operation between remote controls: Used to unify system code values or copy a new remote control.
Since each remote control has its own unique RF code at the time of delivery, when there are multiple remote controls in one system, one of them must be selected as a main, and other remote controls should copy its RF code.1) Main remote control: Press and hold “C” key for 5 seconds. The indicator of the remote control will flash quickly, means it enters the pairing code transmission status.
2) New remote control: Press and hold “B” key for 5 seconds, indicator will turn from 100% to off means it enters learning code status.
3) Indicator of the new remote control flash three times after successful code learning.
Remote control RF code learning from controllers
1) Turn off the power supply of the controllers.
2) Press and hold “B” key for 5 seconds until indicator of remote control turns off.
3) Turn on the power supply of the controllers. Indicator of the remote control flashes three times after successful code learning.
Note: The distance from controllers to remote controls should be less than 2 meters.
Restoring factory settings of remote control
1) Press and hold “B” key for 20 seconds until indicator of remote control process the state as 100% -off-100%.
2) Press “D” button to submit and finish the operation. Indicator of the remote control will flash three times after successful operation.
7. Remote control accessories installation instructions
Accessories include holder 1pc, 3M foam sponge glue 1pc,AAA batteries 2pcs.
Installation instruction:
- Using 3M foam sponge glue make free drilling installation of the holder onto the suitable wall or furniture surface.
- Placing Knob on the holder to operate the controlling, or take the knob and use it on any tabletop as convenience.

Product information for placing order
| Product name | Item number |
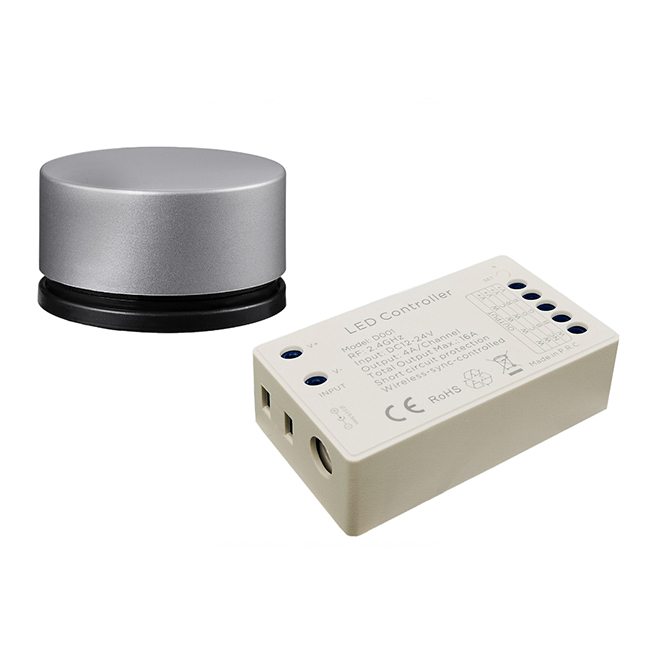
| 4 in 1 LED controller with RFBT remote |
Set packing: HX-D001-RFBT15 Remote control: HX-RFBT15 Receiver: HX-D001 |
Product Video
Data download
Keywords:гҖҖжҺ§еҲ¶еҷЁ гҖҖled гҖҖи°ғ гҖҖHX-SZ600-TOUCH гҖҖHX-SZ600- гҖҖHX-RFBT002-RGB




 Jane-Hoion