HX-D4
-
Product Introduction:
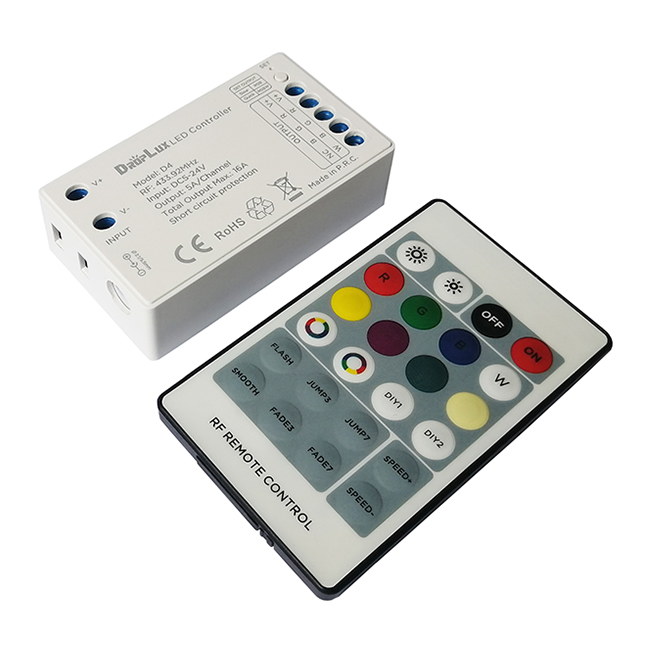
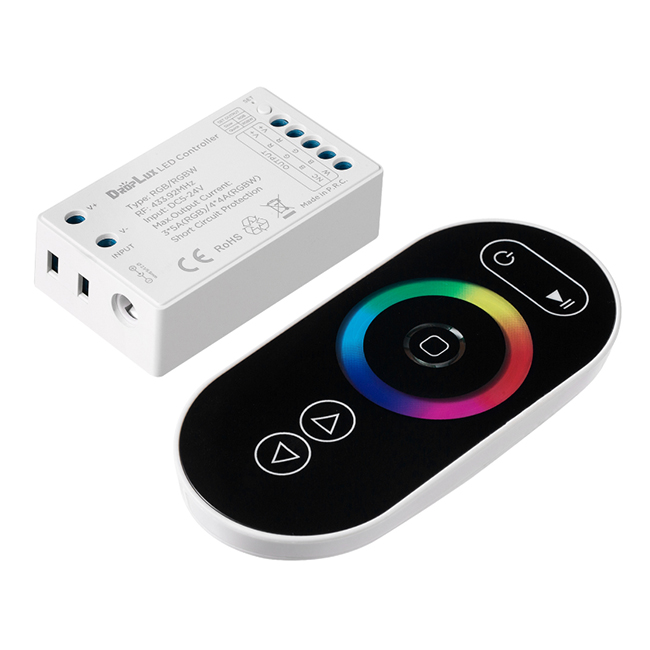
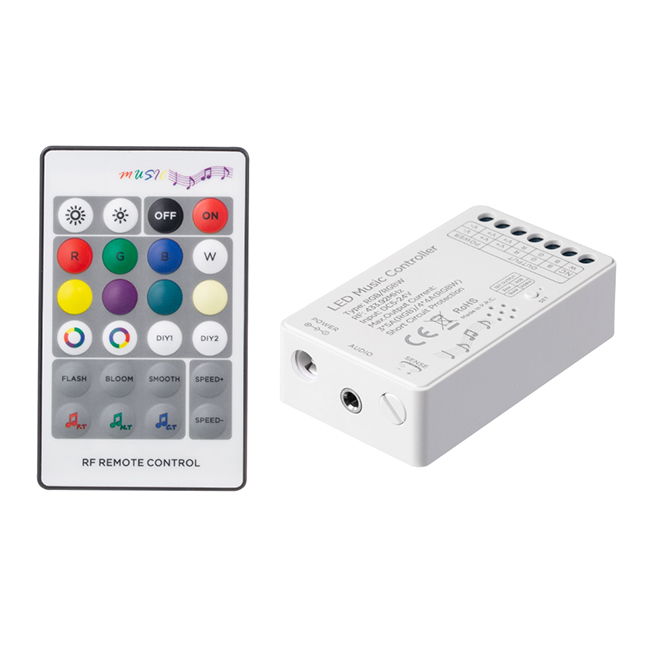
RGB/RGBW 2 in 1 LED controller with RF 24 key remote control Controller adopts the advanced micro control units; it is used for controlling a variety of LED light. For instance, point source of light, flexible light strip, wall washer lamp and so on. It has many advantages such as good appearance, easy connection and simplicity to use. Adopts RF 24 key remote control to ON/OFF, choose colors/ dynamic modes. Especially, it is integrated 2 optional programs for different color type LEDs, contains
Product Details
Product Features:
Controller
Remote control
Key functions for RGB
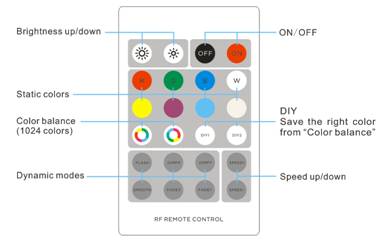
Key functions for RGBW
RF CODE
Receiver can be controlled by any one the same remote as factory default; remote control delivered with unique RF code as factory default; if unique-control is needed, please matching the code before installation and using.
Matching code operation
Receiver and Remote Control are coded as default, matching them before using, if unique-control or new-coded-remote is needed, pairing the remote and the receiver as below operation instructions before using:
Method 1:
1.Step 1: Pressing key “FLASH” and hold on, power on the controller, the load LEDs will be 50% brightness white as responding.
2.Step 2: Pressing “FLASH” 3times in 3 seconds, corresponding to the operation, the LED’s brightness will change as 25%-10%-back to preset level.
3.Code learning successfully, the receiver only can be controlled by the remote.
4.If not, please re-operate from step 1 to 2.
Method 2:
1.Step 1: Power on the controller after well connection.
2.Step 2: 5 seconds long pressing of the “SET” button (on receiver) until the indicator light lights up, pressing “FLASH” (on remote control) 1 time to finish ( “SET” button should be pressed also at the meanwhile), will see the load LEDs flash 3 times by successful operation.
3.Code learning successfully, the receiver only can be controlled by the remote.
4.If not, please re-operate from step 1 to 2.
Clear code operation
Back to factory default, wall-panel can be controlled by any one the same remote control.
Method 1:
1.Step 1: Pressing key “SMOOTH” and hold on, power on the controller, the load LEDs will be 50% brightness white as responding.
2.Step 2: Pressing “SMOOTH” 3times in 3 seconds ,corresponding to the operation, the LED’s brightness will change as 25%-10%-back to preset level.
3.Code clearing successfully, the LEDs will be back to the status before the power off, and the receiver can be controlled by any remote control.
4.If not, please re-operate from step 1 to 2.
Method 2:
1.Step 1: Power on the controller after well connection.
2.Step 2: 5 seconds long pressing of the “SET” button (on receiver) until the indicator light lights up, pressing “SMOOTH” (on remote control) 1 time to finish ( “SET” button should be pressed also at the meanwhile), will see the load LEDs flash 3 times by successful operation.
3.Code learning successfully, the receiver only can be controlled by the remote.
4.If not, please re-operate from step 1 to 2.
Typical Applications
Application Circuit 1: RGB

Application Circuit 2: RGBW

Product information for placing order
- This product is a constant voltage controller, the standard product power supply voltage 5-24V is a wide voltage, and the power supply in this range can be used universally;
- The output is 4 channels, the maximum current of each channel is 4A;
- With power-off memory storage function;
- Adopts RF 24-key wireless remote control, the maximum distance can reach 20 meters;
- Adopts color balance key to achieve 1024 colors and can be saved as DIY modes;
- Both remote control and receiver are 2 in 1 for RGB and RGBW, one product for 2 types of LED strips;
- Short circuit protection function;
- Output current: 3chs * 5A (RGB), 4chs * 4A (RGBW);
- 3-year warranty.
Controller
| Working temperature | -20-60℃ | Supply voltage | DC5V-24V |
| Static power consumption | <1W | Connecting mode | common anode |
| Grayscale | 1024 levels(RGB each) | Speed stage | 100 grade |
| External dimension | L70*W40*20mm | Packing size | L90*W54*H32 mm |
| Net weight | 45g | Gross weight | 70g |
| Output | 3/4 channels | Max. Output current | 5A (each channel), total 16A |
| RF frequency | 433.92Mhz | Remote distance | Up to 20M |
| PWM frequency | 1.95KHz | Memory function | Yes |
| Short-circuit protection | Yes | Max. Output power | 80W(5V); 192W(12V); 384W(24V) |
| Working temperature | -20℃~45℃ | Supply voltage | DC3V(CR2025) |
| Standby current | 3.3uA | Working current | 12mA |
| Standby power | 9.9uW | Working power | 36mW |
| Net weight | 25g | RF frequency | 433.92MHz |
| External dimension | L85*W51*H6mm | RF distance | ≤20m |
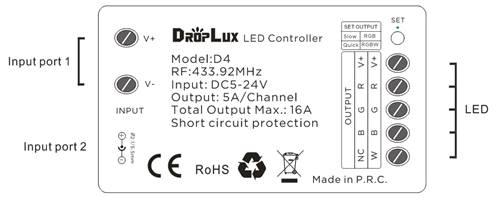
Interface Specifications
Direction for use
- Connect the load wires at first, followed by the power wires.
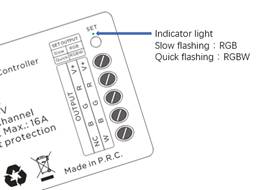
- Use the SET button to set the output type to be consistent with the type of LEDs connected to the load. The indicator flashes slowly: RGB, flashes quickly: RGBW.

- Adopt 2 in 1 RF wireless remote control, 24 keys in total, function of each button as below:

Key functions for RGB
| Brightness + | Brightness - | Off | On |
| Static Red | Static Green | Static Blue | Static white |
| Static Yellow | Static Purple | Static Cyan | Static warm white |
|
Color balance in left direction, 1024 colors in total. |
Color balance in right direction, 1024 colors in total. |
DIY 1 Short pressing to extract stored mode; long press for 3 seconds to store the new mode after adjustment. |
DIY 2 Short pressing to extract stored mode; long press for 3 seconds to store the new mode after adjustment. |
| Flashing for all available colors | 3 color jumpy | 3 color gradually change | speed + |
| Smooth for all available colors | 7 color jumpy | 7 color gradually change | speed- |
| Brightness + | Brightness - | Off | On |
| Static Red | Static Green | Static Blue |
Static white (Short press- W switch ON/OFF, long press- W dimming) |
| Static Yellow | Static Purple | Static Cyan | Static warm white |
|
Color balance in left direction, 1024 colors in total. |
Color balance in right direction, 1024 colors in total. |
DIY 1 Short pressing to extract stored mode; long press for 3 seconds to store the new mode after adjustment. |
DIY 2 Short pressing to extract stored mode; long press for 3 seconds to store the new mode after adjustment. |
| Flashing for all available colors | 3 color jumpy | 3 color gradually change | speed + |
| Smooth for all available colors | 7 color jumpy | 7 color gradually change | speed- |
Receiver can be controlled by any one the same remote as factory default; remote control delivered with unique RF code as factory default; if unique-control is needed, please matching the code before installation and using.
Matching code operation
Receiver and Remote Control are coded as default, matching them before using, if unique-control or new-coded-remote is needed, pairing the remote and the receiver as below operation instructions before using:
Method 1:
1.Step 1: Pressing key “FLASH” and hold on, power on the controller, the load LEDs will be 50% brightness white as responding.
2.Step 2: Pressing “FLASH” 3times in 3 seconds, corresponding to the operation, the LED’s brightness will change as 25%-10%-back to preset level.
3.Code learning successfully, the receiver only can be controlled by the remote.
4.If not, please re-operate from step 1 to 2.
Method 2:
1.Step 1: Power on the controller after well connection.
2.Step 2: 5 seconds long pressing of the “SET” button (on receiver) until the indicator light lights up, pressing “FLASH” (on remote control) 1 time to finish ( “SET” button should be pressed also at the meanwhile), will see the load LEDs flash 3 times by successful operation.
3.Code learning successfully, the receiver only can be controlled by the remote.
4.If not, please re-operate from step 1 to 2.
Clear code operation
Back to factory default, wall-panel can be controlled by any one the same remote control.
Method 1:
1.Step 1: Pressing key “SMOOTH” and hold on, power on the controller, the load LEDs will be 50% brightness white as responding.
2.Step 2: Pressing “SMOOTH” 3times in 3 seconds ,corresponding to the operation, the LED’s brightness will change as 25%-10%-back to preset level.
3.Code clearing successfully, the LEDs will be back to the status before the power off, and the receiver can be controlled by any remote control.
4.If not, please re-operate from step 1 to 2.
Method 2:
1.Step 1: Power on the controller after well connection.
2.Step 2: 5 seconds long pressing of the “SET” button (on receiver) until the indicator light lights up, pressing “SMOOTH” (on remote control) 1 time to finish ( “SET” button should be pressed also at the meanwhile), will see the load LEDs flash 3 times by successful operation.
3.Code learning successfully, the receiver only can be controlled by the remote.
4.If not, please re-operate from step 1 to 2.
Typical Applications
Application Circuit 1: RGB

Application Circuit 2: RGBW

Product information for placing order
| Product name | Item number |
| RGB/RGBW 2 in 1 LED controller with RF 24 key remote control | HX-D4 |
Product Video
Data download
Keywords: 控制器 led 调 HX-SZ600-TOUCH HX-SZ600- HX-RFBT002-RGB


 Jane-Hoion